In this latest video installment, Than Thein gives you insights on the fundamentals of aquarium photography.
You can also watch this video directly on Youtube
Aquarium Photography
At its core, the reef aquarium hobby is a pursuit of aesthetics. We seek out visually appealing fish and corals and look for inspiration in other aquarists’ tanks. More and more reef hobbyists want to share their hobby with others online, and that’s when things fall apart. It is not a failing of the reef tank so much as that the photo taken doesn’t do it any justice.
Our reef tanks happen to be one of the most challenging subjects to shoot. Chief among these challenges is the fact that our aquariums are dark subjects. For all the marketing aquarium lighting companies do to promote the incredible intensity of their fixtures, our tanks actually appear dim to cameras. In fairness to these companies, the lights do what they are supposed to do, which is keep livestock healthy and look aesthetically pleasing to our eye. In many cases a more powerful fixture is a detriment. Modern aquarium lighting is more than powerful enough to fry all your corals if turned up too high. Photography, on the other hand, is a different animal, and it hungers for more light.
Basics of Exposure
Light intensity issues can be resolved through a better understanding of exposure. A digital camera with manual settings allows the photographer to adjust three important parameters to control exposure. These parameters are Aperture, Shutter Speed, and ISO. In the past, this sort of manual control was only available in DSLR cameras; however, it is now possible to find iOS or Android apps for our smart phones that allow manual control. Let’s take a closer look at each of these three parameters.
Aperture
Aperture is the size of the opening in the lens that allows in light. A larger aperture is desirable because it allows in more light than a smaller aperture. Aperture is measured in terms of an f-number or f-stop. The f-stop is a fraction, so f/8 is a smaller aperture than f/2.8. The largest apertures available on most lenses are f/2.8 to f/4.0. Some specialty prime lenses can open up to an incredible f/0.98, but you can expect to pay well over $10,000 for one of those.
Large apertures also come with an associated side effect. Your photos will have what is called reduced depth of field, which means the subject will be in focus while the background will appear out of focus. On one hand, this is a great creative effect if you want to isolate a subject and deemphasize everything in the foreground and background. It can be a hindrance, however, if you want to get everything in focus. When I shoot, I try to stay around f/8 to f/11 to get as much of the subject in focus as possible. If I wanted to isolate a single fish and blur out the background into a creamy swirl of color, I would open up the aperture and shoot at f/2.8.
Shutter Speed
Shutter Speed is how fast the shutter stays open to allow in light. When shooting dim subjects, having a slower shutter speed allows in more light. The tradeoff is the slower the shutter speed, the more susceptible the image is to motion blur from both the subject moving and shaking from hand-holding a camera. At Tidal Gardens, we mainly shoot corals, which are more or less stationary. For this, a tripod is very helpful (by helpful, we mean 100% necessary) because it allows us to have longer exposure times.
ISO
Lastly, we have ISO. The term “ISO” is an artifact term from film cameras referring to film speed. In digital cameras today, obviously there is no film, so what ISO means in the digital context is sensor sensitivity. It is possible to “dial up” the sensor to be more responsive to light. The downside to manipulating the ISO in this manner is that it introduces noise artifacts into the image, and the image looks more grainy, flatter, and less dynamic. A good analogy to understanding ISO is a radio or cell phone with poor reception. Turning up the volume helps to hear the words, but by doing so you also hear more of the static.
Hose and Bucket Analogy
The best analogy I’ve ever heard to describe the relationship between Aperture, Shutter Speed, and ISO is a hose filling a bucket. Picture yourself trying to fill a bucket with water. The goal is to fill the bucket as quickly as possible.
The diameter of the hose represents aperture. The larger the hose, the greater the flow rate. The shutter speed is how long the water stays running through the hose. A narrow hose will require a longer time period, while a larger hose requires a shorter time period. ISO is a little more abstract in the bucket analogy, but it can be thought of as the type of liquid being poured. Instead of water filling the bucket, imagine instead it is shaving cream that rapidly expands. To fill the bucket with shaving cream, it takes less time and a smaller hose than filling it with water. The problem with shaving cream is it is not clear like water, and that opacity makes it harder to see the subject. The job of the photographer is to find the best balance of aperture, shutter speed, and ISO while minimizing the drawbacks of each one discussed above.
Tank Lighting and Photography
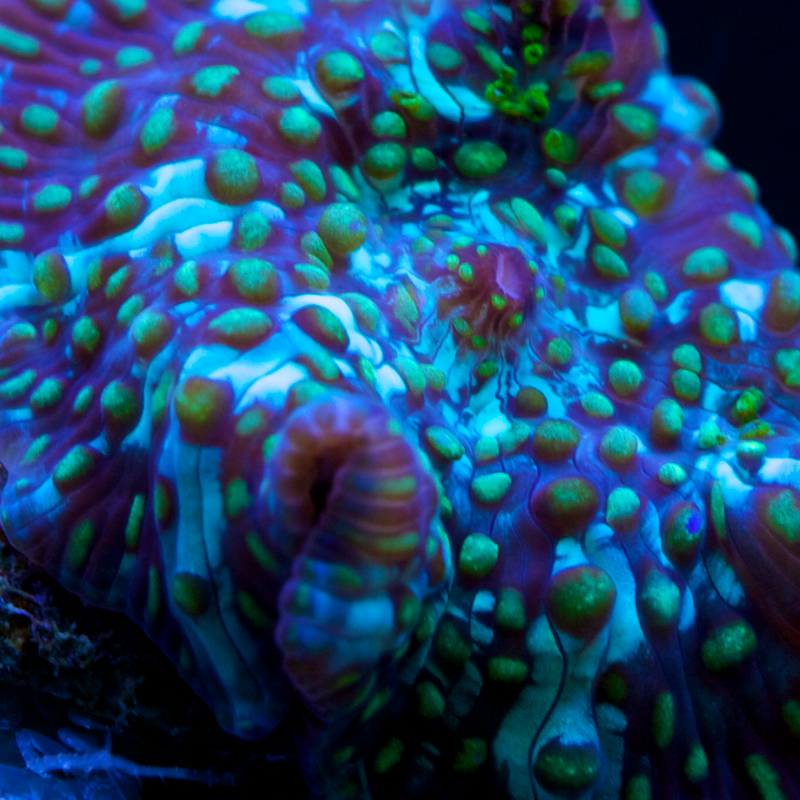
At Tidal Gardens, we get asked all the time if we shoot our pictures under LED. I can guess the reason people ask. LED-lit tanks, especially those dominated with blue and royal blue LED’s, have a distinct ultra-fluorescent appearance that exaggerates the colors of corals.
The short answer is no. Tidal Gardens does not shoot under LED’s, but it has nothing to do with the natural or unnatural appearance of corals. LED’s are easily the worst lights to shoot under. LED’s have very narrow spectral peaks compared to other types of light that tend to have a more robust spectrum. Our eyes manage to see the color better than a camera sensor so it doesn’t seem so bad. To a camera, though, all it sees is a massive overload of single colors, and the resulting image is covered in blobs of blue and purple with zero detail. T5 and MH bulbs will give you the best looking photos.
Practical Tips to Improve Reef Photography
Tripod
A tripod is possibly the most effective accessory that can be purchased to improve photos. By keeping the camera as still as possible, it allows the photographer to use longer shutter speeds. Any shutter speed slower than 1/60th of a second risks the introduction of blur from shaky handholding. By placing the camera on a tripod, it is possible to shoot with longer shutter speeds (over 1 second), provided that the subject is relatively immobile (an invertebrate or coral).
A tripod won’t help much with taking pictures of fast-moving fish, because it is the movement of the fish that is the problem, not the movement of the camera. In order to take clean images of fish, the photographer will need to use a shutter speed that is fast enough to freeze motion, the slowest of which is around 1/250th of a second. Some photographers try to shoot for something closer to 1/400th of a second. A shutter speed this fast is challenging to attain because it does not allow in very much light. To get this picture to come out, one must likely boost the ISO and open the aperture of the lens fully to compensate. Alternatively, a flash can be used to introduce more light.
Remote Shutter Release
A remote shutter release sounds very technical, but all it really is is a wired remote control that you can use to take a photo. A remote shutter release allows you to take a photo without pressing down on the camera’s button. It sounds minor, but when using certain lenses, a slight bump of the camera can ruin the photo, so it’s preferable to not have to touch the camera to snap the picture. Alternatively, many cameras have built-in timers so you can press the shutter and in 2-10 seconds the camera takes the picture. This fixes the problem of touching the camera while the shutter is activated; however, I am impatient and purchased the remote shutter release for my camera.
Shoot Perpendicular to Glass
Reef aquariums present a unique challenge to photographers in that most of the time the shot will be taken through the glass. The glass itself acts as a lens and can introduce severe distortion. This distortion makes it appear that the subject is smeared or slightly out of focus. The immediate inclination is to start playing with the focus, but the image will never focus properly. The solution to this problem is to try and shoot perpendicular to the glass as much as possible. The greater the angle, the worse the distortion.
Sometimes I am trying to shoot a piece of coral and the best angle isn’t that perfect 90-degrees. I end up looking at the side of the coral and it’s just the wrong composition. Instead of angling the camera to try and get a 45-degree shot through the glass and dealing with all that distortion, I will physically move the coral in the tank to get the angle I want.
Viewing Box
In the event that a perpendicular shot through the glass just isn’t possible, shooting with a viewing box may be the solution. Think of a viewing box as a scuba mask for your camera. It allows you to maintain that perpendicular orientation to the window as you look around in the water. Viewing boxes are the perfect tools for taking top-down shots, which can be very rewarding because for many corals, and even fish, the top-down angle is the most flattering by far.
Underwater Housing
If you are insane about reef photography, there is the option to go all-out and purchase an underwater housing for your camera. With a quality housing, not only can you fully submerge your camera in your tank, you can also take it snorkeling or diving.
A good housing, however, can be very expensive, and it will only work with the camera model you choose. They are built like a tailored suit to account for the controls to a specific camera. Even slight updates from one model of camera to the next year’s model will likely mean the housing no longer fits.
Conclusion
In summary, photography of our reef aquariums can be a challenging endeavor. Understanding the basics of exposure and light will go a long way towards improving the photographs you take and share with other enthusiasts.


Trackbacks/Pingbacks