This installment informally ties together three previous blog entries: photography, fish size estimation and the HLLE project. Much public aquarium work operates in this fashion, many different small topics and projects may be tightly woven together:
While attending a public aquarium conference, I saw a video presentation in which a deep sea submersible was operating, and it was projecting two red laser beam spots onto the sea floor as it passed on by. I immediately concluded that this was being done in order to give a size reference to any objects or animals that were filmed by the operators of the submersible. I decided to try and apply the same technique to aquariums, hopefully resulting in a more accurate way to measure aquarium inhabitants for growth studies and the like.
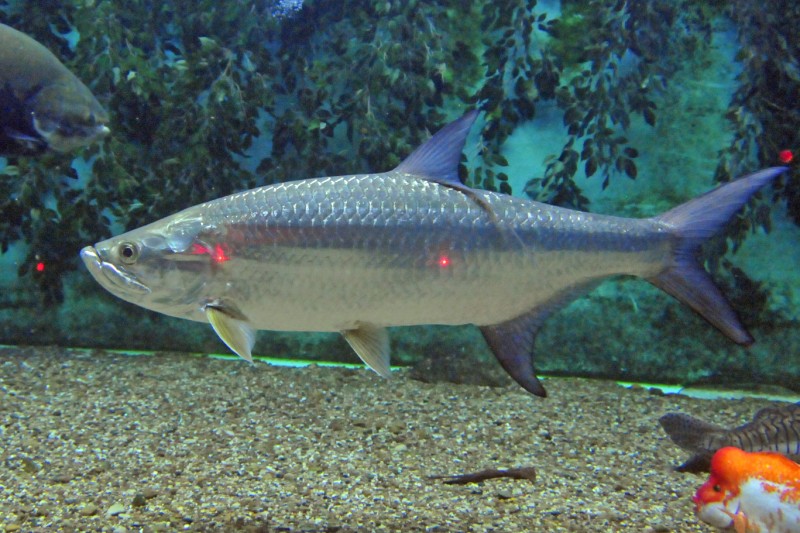
A tarpon calculated to be 40.5″ long
The idea of determining fish lengths in-situ has been around probably since the inception of aquariums. Obviously, catching up fish just to measure them is time-consuming and hard on the fish. However, the farthest I had ever gone with this idea before was to take a picture of something underwater with a ruler next to it for scale. While I didn’t find much similar work posted on the Internet, I did discover that some other public aquarists had set up similar laser systems, but these were fairly basic and there was room for improvement.
The laser holding system that I developed incorporated two red lasers designed to attach to golf putters and help golfers direct their putts. I attached them to the twin arms of a Stroboframe flash bracket. Not including the digital camera, this apparatus cost less than $120. Other methods have been used by others, but are not as rigid, and can introduce errors into the measurements (such as mounting the lasers on PVC pipe). Stroboframes are expensive, and enterprising aquarists may find other devices, such as fly tying jigs will work equally well, but for less cost. For measurement by divers, there are underwater lasers available (used by SCUBA divers to point out objects underwater) that could be combined with an underwater camera to achieve the same results while diving.
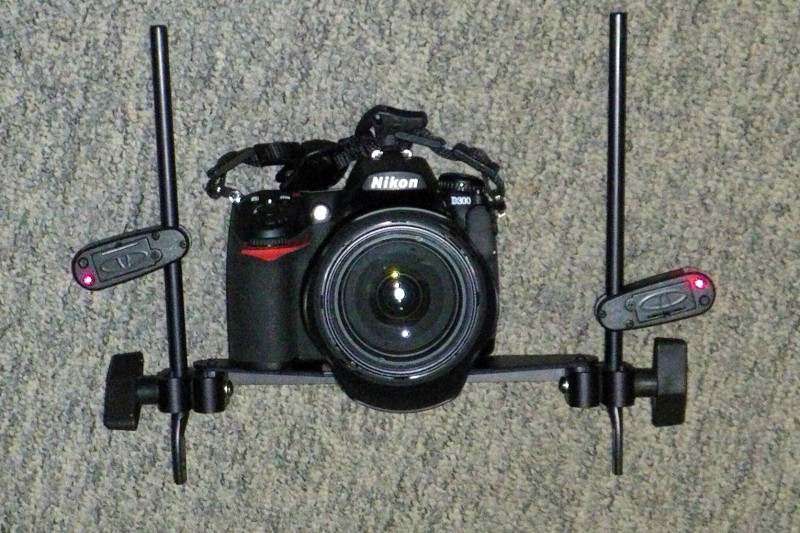
Twin lasers and camera attached to a Stroboframe
The basic idea is that two lasers, set parallel to each other, at a known distance from each other, would produce two laser spots at a far distance at the same width apart. Three unknowns were identified; what would the effect be if the subject was not exactly perpendicular to the twin laser beams? What effect would light refraction have? And what amount of error would be introduced if the beams were not exactly parallel?
Surprisingly, a small amount of error between the fish subject and the laser device does not create a larger error in the estimated measurement. The graph shows that up until around 10 degrees from parallel, the percentage error is less than 1.5%. However, it also shows that the percentage error increases rapidly beyond that point, so it is not a linear relationship. Luckily, most people can visually estimate the angle between objects to within 10 degrees.
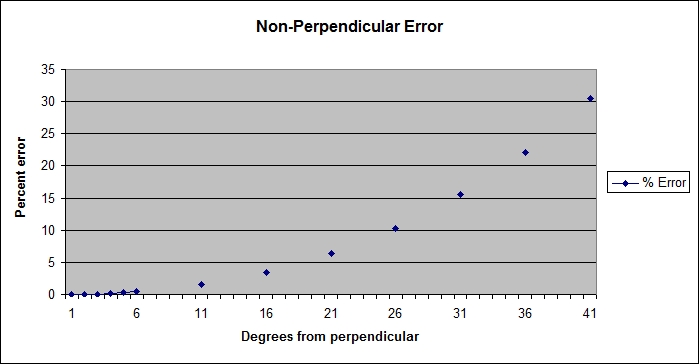
Non-perpendicular error percentages
Tests using rulers show that while refraction does occur, it involves all components, so laser spots set 12″ apart outside the aquarium, will show up 12″ apart on the ruler, but both the ruler and the spots will seem to be about 30% larger than they really are – this has been the bane of all outside-the-aquarium fish measurements to date. The black tip shark in the attached image had been estimated to be 50″ long. The lasers show that it is actually only 39″ long.
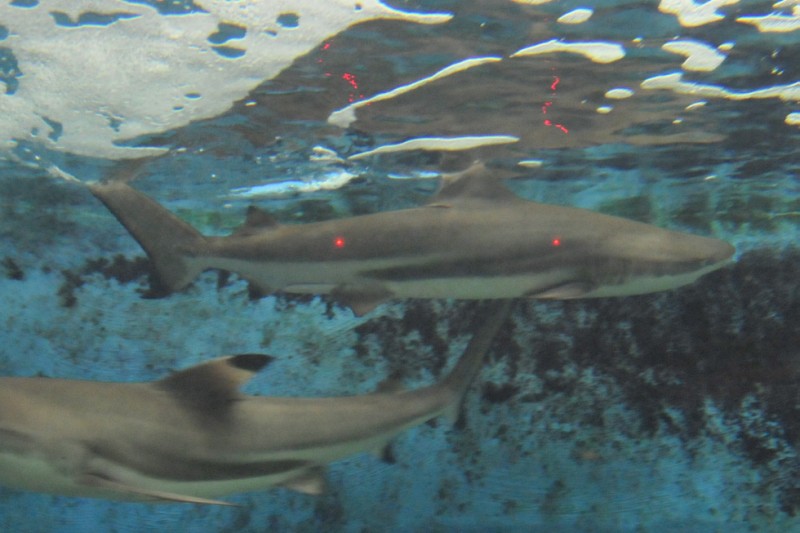
Not 50 inch as initially thought, this was determined to be a 39 inch Pacific Blacktip Reef Shark
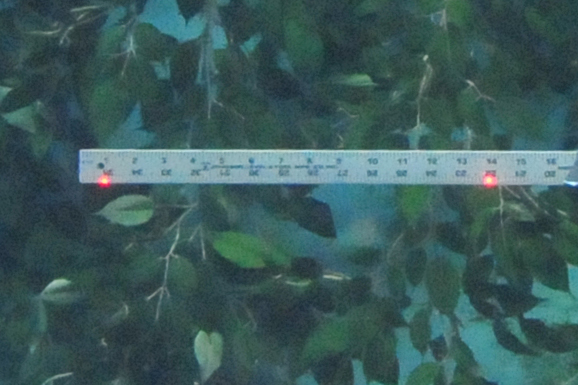
13 inch wide twin beams as seen through through 14 feet of water.
During bench testing, with the lasers set 13″ apart and shining on a wall 15 feet away, it was shown that an infinitesimal change in the angle of the lasers created a large change in the distance between the projected dots. In fact, this can be used to advantage when adjusting the beams to make them parallel.
It had been proposed that green laser lights might produce better penetration through the water than red lasers. I also wondered if the green laser would elicit less of a predation response than the red lasers (see below). A green laser (532 nm, < 5 mw) was tested. The beam of the green laser seemed more coherent (less divergence at the endpoint) but it was not as visible in aquariums as the red laser was (635 nm, < 5 mw). The predatory fish did not follow the green laser quite as much, but this may be a function of it being less visible. In brightly lighted coral exhibits, the green laser was not visible at all. It seems then, that red laser light would be preferable for aquarium applications.
One difficulty in designing a laser system is that most laser pointers have a momentary switch, as opposed to an on and off switch. One work around for this is to loosely attach a small hose clamp to the body of each laser. When you need them to operate, just slide the clamp up, over the button switch, activating the device.
Two additional problems involve the laser lights themselves. Reflection occurs as the laser penetrates different materials, so that in some images, instead of seeing two red dots, there are multiple dots along the same plane. Knowing where the two original dots lay along the subject when the image was taken makes it possible to just ignore the reflected dots. The second problem is that as mentioned, some predatory fish react to laser dots as they would small prey, and try to chase and eat the laser dots as they project on the tank walls, etc. This can make it difficult to align the dots properly.

Using dial calipers to measure the size of fish from an on-screen image
Originally, the fish lengths were calculated by bringing the image of the fish up onto a computer screen and using dial calipers to measure the distance between the two laser spots. Then, this distance was used to set the scale of the image, and the fish on the screen was measured with the calipers as well. While this seemed to work well, another aquarist told me about this free software:
http://ddsdx.uthscsa.edu/dig/itdesc.html
You use your mouse to draw a line on the computer screen between the two dots, and then enter in the known distance between them. This sets the scale for the image. Then, draw a line on the fish’s image that corresponds to its nose to tail distance (SL, FL or TL) and the program gives the length. The interesting thing is that the software then allows you to draw a multi-sided polygon around an object. When this is done, the software calculates the area of the polygon. For example, the catfish in the attached image is 18.5″ total length, and its eye is 0.20 square inches in area. This process will have application in my upcoming HLLE study, where I’ll need a means to measure the size of the HLLE lesions over time to see if they are increasing or decreasing in size.
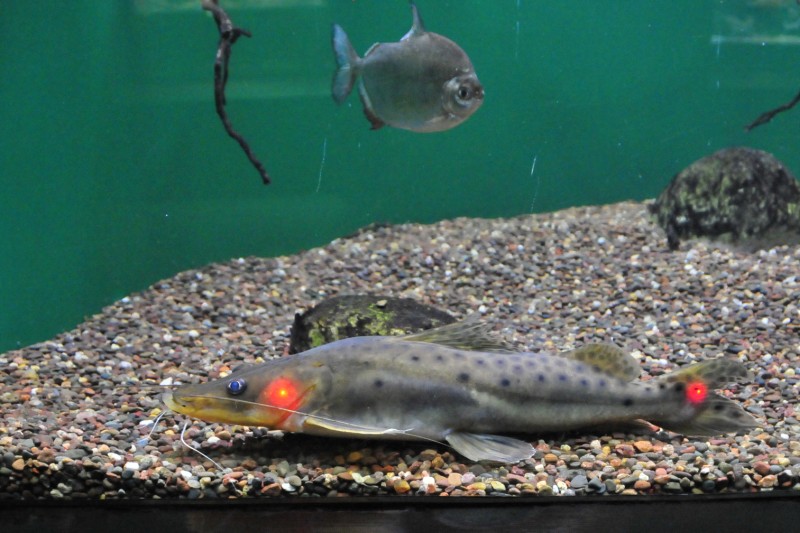
This catfish was estimated to be 18.5″ long
The views expressed on this weblog are mine alone and do not necessarily reflect the views of my employer.