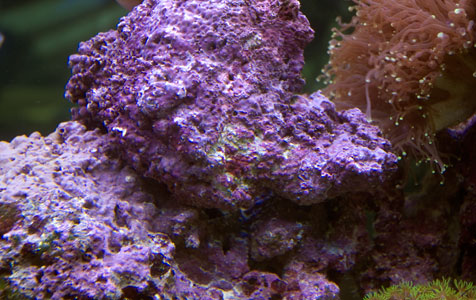
Rescued tank – After. (See Before, Part I, below.)
I would like to begin Part II by properly re-introducing myself. “Hello, my name is Carl. I’m a professional aquarist, a husband and father. I love marine aquaria and everything about them.” (See: Mystery of the Green Hair Algae)
I thought I’d start with the introduction because you and I are going to spend the day together. We will step by step “Rid” your tank of hair algae and hopefully, restore the aquarium to a place where the hair algae problem does not return.
Supplies you are going to need:
- Buckets and hoses for siphoning and water changes.
- High quality marine salt mix or natural seawater.
- Soft and medium bristle scrub brushes and perhaps a toothbrush.
- Plain white vinegar
- An air pump with air hose and a fine mist airstone.
- A power head.
- A submersible heater.
- Test kits including:
- pH
- KH or Alkalinity
- Calcium
- Ammonia
- Nitrate
- Nitrate
- Phosphate
Alright, got everything? Great! Now recall I just mentioned we were going to spend the day together? Well, indeed we are but that day is tomorrow. Today is a preparation day. Here is what I want you to do today:
Mix enough seawater to make a 30% water change PLUS another 20 – 25 gallons. Now put the powerhead, the airstone and the heater in the container with the newly mixed seawater. Turn on the air pump. Set the heater to the same temperature as your aquarium. If you need to chill the water instead, you can place a fan so that it blows across the top of the container.
Ok, go enjoy the rest of the day and meet me back here tomorrow at the same time.
… 24 hours later.
Welcome back! Sorry for the long delay but the 24 hour aging of the seawater is very important and we needed to do it. Of course, if you are using natural seawater for the water change, you could skip this overnight step but I would still aerate the water for several hours with the air pump and airstone. Now let’s get started!
The first thing we are going to do is look around the tank and see if any of the hair algae looks long and loose. If it does, let’s take a siphon hose and remove the longer, loose stuff. We don’t want it falling off in a few minutes when we take the live rock out.
Next remove the live rock from the tank and place it in a container large enough to hold it all. If there are individual rocks with corals permanently attached, put them in a different container with water from the tank.
Now that the tank is empty of live rock, let’s look at the substrate. Is the hair algae growing on the substrate? If it is, we will want to toss it out. Use an aquarium net to remove all the substrate and discard it. If there is no hair algae on the substrate, then use a siphon hose and bell to thoroughly siphon the entire bottom. Make sure there is no detritus left in the substrate!
OK, now if you had some pieces of rock with corals attached take a toothbrush and gently clean the algae from these rocks. Do this while keeping the rock submerged in the bucket of old tank water. Make sure not to miss anything! Once finished, take a powerhead and blow water through all the holes, crags, nooks and crannies in the live rock to get all the detritus out. Now rinse them with water from the aquarium and place them back in the tank.
We are going to take the rest of the rocks outside (or to a large laundry sink) and scrub them with the larger brushes. Just as above, remove all the algae, and rinse them is seawater. Then use the powerhead on the holes, etc. and rinse again (see, this is why you needed the extra 25 gallons of water over and above the water change). When you are satisfied the algae is gone, take one of your large brushes and dip it is a bowl of white vinegar. Scrub the rocks with the vinegar coated brush. This additional step will help to remove the calcium phosphate which is adhered to the rock and would contribute to the algae returning. Rinse with seawater one last time and return the rock to the tank.
Still with me?
Great! Ok, now let’s redecorate the aquarium and replace the water we siphoned out with the aged seawater we made yesterday. Ah, that’s better! If you had to remove the substrate, wait another day before putting new substrate in. This will allow any free-floating detritus to collect on the bare bottom where it can be easily siphoned off.
Now you have an “algae free” aquarium again. Test all your water parameters and make sure they are in the correct range. These ideals should be:
- Specific Gravity – 1.025
- pH – 8.3
- KH – in the range of 8 to 10
- Calcium 420 ppm
- Ammonia – 0 ppm
- Nitrite – 0 ppm
- Nitrate – 0 ppm
- Phosphate – 0 ppm
If your values are outside of these ideals, slowly bring them back in line by follow the advice given in Part I.
That’s it! Hopefully, the aquarium will remain “algae free” from here on. Following the advice given in Part I as an ongoing maintenance program will help to ensure we never have to repeat this labor intensive second part again. Don’t worry though, if the algae does come back, just come see me. I’ll be right here.


Trackbacks/Pingbacks